Friday, 27 May 2011
Weekly Blog Round Up - Week 9!!!
Stacie was inspired by Prada S/S 2011 http://kawaiinailart.blogspot.com/2011/05/blue-and-white-china-pattern.html
Lena is having a clear out – fancy grabbing a bargain? http://thestudentsguidetonailpolish.blogspot.com/2011/05/updated-blog-sale-barry-m-nails-inc-no7.html
The Nail Addict created this juicy water marble design http://thenailaddict.blogspot.com/2011/05/orange-water-marble-design.html
Sharon had fun with smashing her rainbow http://polishinfatuated.blogspot.com/2011/05/shattered-rainbow.html
Grace was inspired by Lagerfeld to create this design http://ooooohpretty.blogspot.com/2011/05/nails-fit-for-harvey-nichols.html
Nic was absolutely besotted with Absolutely Alice http://nicnacksnails.blogspot.com/2011/05/i-finally-tried-it.html
Jen let her sunny disposition show with her new Zoya http://moondancerjen.blogspot.com/2011/05/pippa-my-new-obsession.html
Theresa explains exactly what Shellac and Gelish semi-permanent polishes are http://theresabloor.blogspot.com/2011/05/what-are-shellac-and-gelish-nails.html
Ling Ling tried a cool tie-dye manicure http://wuliaonails.blogspot.com/2011/05/new-haul-and-tie-die-haulter-top-mani.html
Avast me hearties! Claire tried out OPI pirates’ collection and the wicked silver shatter http://toptwentynails.blogspot.com/2011/05/opi-pirates-of-caribbean-with-silver.html
Ari use pastels for a cute nail art manicure http://ari-sweetdelight.blogspot.com/2011/05/pastel-cute.html#more
Hey guys!
I'm in the middle of moving so sorry for the plain text update! I am having to load this using my phone!
Hope you enjoy the wonderful updates from these fellow bloggers!!
Have a great weekend :)
Claire xxx
Monday, 23 May 2011
Welcome and Blog Update
Hello to all my lovely followers, old and new!
I am currently in the middle of packing up and moving house, so please be patient - I will be updating my blog again from the middle of next week. I am sorry for the lack of updates but will be back with you again soon!!
In the mean time, do let me know if there are any specific nail topics from the view of a professional you would like to see me blog about!!
Claire xxx
Friday, 20 May 2011
Weekly Blog Round Up - Week 8!!
Hey Guys,
Below is this weeks Blog Round Up - take a look at some of these great ideas from fellow bloggers!!
Jen created a gorgeous gradient manicure http://moondancerjen.blogspot.com/2011/05/gorgeous-glitter-gradient.html
Claire’s tutorial shows the simple way to do a half moon manicure http://toptwentynails.blogspot.com/2011/05/moon-manicure-tutorial.html
Nic celebrated finishing the school year with some swatches http://nicnacksnails.blogspot.com/2011/05/recent-notd-swatches.html
Sharon showed us her adventures in drag marbling http://polishinfatuated.blogspot.com/2011/05/drag-marbling-take-two.html
Grace had some fun with glitter to great effect http://ooooohpretty.blogspot.com/2011/05/oooooh-glitzy.html
Ladyluck took a break from her nails this week and created an eye look http://ladyluckbeauty.blogspot.com/2011/05/spring-makeup.html
Theresa has used Gelish in a fade effect with some great 3D acrylic flowers http://theresabloor.blogspot.com/2011/05/nail-desing-of-day-gelish-fade-with-3d.html
...and finally introducing Erin to the blog world http://sugarstar.host-ed.net/blog/
Thursday, 19 May 2011
Moon Manicure Tutorial
Hi Guys,
As we saw last season on all the catwalks last season, I have pulled together a simple step by step guide to achieve a Moon Manicure. This is where the moon (the are close to the cuticle which is a slightly lighter colour) is a different colour to the rest of the nail.
For this tutorial, I have used a gold glitter (OPI's Glitzerland) and for the rest of the nail I have used a deep plum (OPI's Lincoln Park After Dark). This manicure can be achieved free hand - which is how I would normally do this as I find it quicker, but for those who do not have such a steady hand the hole reinforcers for filing give a great shape and save a lot of touching up!!
For those of you who use Shellac and other similar products, this can be easily dont, by curing two coats of your base, a lighter colour, and then applying the darker colour - sweeping out the moon with a barely damp brush soaked with alcohol.
What I used:
 Step 1 - Prep nails and apply base coat
 Step 2 - Apply coat 1 of your base colour (the colour you want your moon)
 Step 3 - Apply a second coat and allow to dry completely
 Step 4 - Apply the reinforcing stickers
 Step 5 - Apply two coats of the colour you want on the rest of the nail - it is best to use a high coverage and darker colour
 Step 6 - Carefully remove the hole reinforcers and apply top coat
 I hope that you have found this helpful - there are so many colour options that you can use for this, and it really is something different!
Let me know how you get on!!
Claire xxx
As we saw last season on all the catwalks last season, I have pulled together a simple step by step guide to achieve a Moon Manicure. This is where the moon (the are close to the cuticle which is a slightly lighter colour) is a different colour to the rest of the nail.
For this tutorial, I have used a gold glitter (OPI's Glitzerland) and for the rest of the nail I have used a deep plum (OPI's Lincoln Park After Dark). This manicure can be achieved free hand - which is how I would normally do this as I find it quicker, but for those who do not have such a steady hand the hole reinforcers for filing give a great shape and save a lot of touching up!!
For those of you who use Shellac and other similar products, this can be easily dont, by curing two coats of your base, a lighter colour, and then applying the darker colour - sweeping out the moon with a barely damp brush soaked with alcohol.
What I used:


Let me know how you get on!!
Claire xxx
Wednesday, 18 May 2011
My first attempt at a Stiletto Nails!!!
There are a number of competitions that I am looking to enter over the summer and want to use the Stiletto Nail for some of my designs, so thought I should get practicing.
Today I am showing you my first ever attempt at a Stiletto - this is by no means good but just wanted to share it with you - and maybe get some feedback?! Have you ever tried this style?! I am packing up my house to move next week so had to do this on my lap which was not ideal!!!
I used a 'Kiss press on nail' as I did not want to have it on my natural nails and I could then take it off. I perhaps should not have attempted this on myself first and will not be investing in one of those finger model things!!
I also used buff off UV gel for this, and actually think that getting the basic shape might be best with L&P acrylic and will be giving this a try next time adding a mix. I have many more acrylic colours, and am not sure why I tried gel first!!
What I did:
Step One: Apply removable nail (this was just my step and a good idea for a photo shoot or fashion show as they can be pre-designed). Buff and prep the nail
 Step Two: Apply a form - You want to ensure that the form is snug under the nail and that the side walls a straight - this is not that easy!!! To make the Stiletto shape, you need to pinch the ends closed and ensuring that a rounded shape is maintained.
 Step Three - Apply a thin layer of gel to the nail and onto the form to the length desired. Cure the gel. Once cured, remove the form (finger end first so as not to add stress to the nail). Gently buff away and ragged edges.
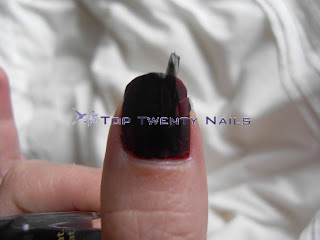
 Step Four: Apply your colour gels however you like. Here I have done a black to purple fade with a white french tip...the balck and purple did not blend as well as I like as I flash cured the black - not the best idea! Cure the colours when happy
 Step five: Add any further colours, glitters, lace and netting - I have just used glitter gels here, but you can use pretty much anything! I applied silver in a twist across the nail and added crystal white glitter to the 'French Tip'.
 Step Six - When happy cure the nail and apply a clear gel all over the nail ensuring extra gel is in the stress area and center of the nail to ensure strength.
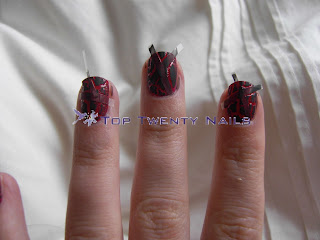
 Step Seven - File and buff the nail to ensure correct shape and to smooth the nail. You can now add on any further details - I have use acrylic paints in pink and purple flicks just to see how it works.
 Step Eight: Apply top sealer
 When the nail is covered in top sealer, cure
 Step Nine - Your nail is finished!!

I know that this nail is not perfect - but I didn't think it was too bad for a first attempt - I hope that this will be the start of many!! Going forward, I will design the nail in advance, as this is just a jumble of ideas and not very coherent!!
I used NCO buff of gels in Black, Purple Flower, Extra White, Clear and Pink Base & Build, Crystal White and Silver Aurora.
Thanks so much for reading!!
Claire xxx
Today I am showing you my first ever attempt at a Stiletto - this is by no means good but just wanted to share it with you - and maybe get some feedback?! Have you ever tried this style?! I am packing up my house to move next week so had to do this on my lap which was not ideal!!!
I used a 'Kiss press on nail' as I did not want to have it on my natural nails and I could then take it off. I perhaps should not have attempted this on myself first and will not be investing in one of those finger model things!!
I also used buff off UV gel for this, and actually think that getting the basic shape might be best with L&P acrylic and will be giving this a try next time adding a mix. I have many more acrylic colours, and am not sure why I tried gel first!!
What I did:
Step One: Apply removable nail (this was just my step and a good idea for a photo shoot or fashion show as they can be pre-designed). Buff and prep the nail


I used NCO buff of gels in Black, Purple Flower, Extra White, Clear and Pink Base & Build, Crystal White and Silver Aurora.
Thanks so much for reading!!
Claire xxx
Tuesday, 17 May 2011
OPI Femme De Cirque - I Juggle Men & So Many Clowns So Little Time
I have had my eye on OPI's 'I Juggle Men' which has been described as an iridescent shimmer coat for a while and finally ordered it along with another lacquer from the collection, 'So Many Clowns So Little Time'.

I like the soft shades for bridal nails so I was very interested to see how these two lacquers would work together to create something a little different but not outrageous - and this is exactly what it does. I Juggle Men is a sheer top coat with tiny particles and a slight purple hue. This would look great over dark and light colours, but I only had my thumb left, so have just shown you this over So Many Clowns - but I will update you further when I change my mani!!


I like the soft shades for bridal nails so I was very interested to see how these two lacquers would work together to create something a little different but not outrageous - and this is exactly what it does. I Juggle Men is a sheer top coat with tiny particles and a slight purple hue. This would look great over dark and light colours, but I only had my thumb left, so have just shown you this over So Many Clowns - but I will update you further when I change my mani!!

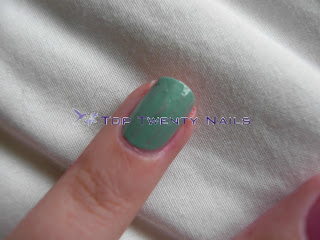
This is one coat of So Many Clowns So Little Time

Two coats of So Many Clowns So Little Time. The colour is similar to the Bridal Collection 'At First Sight'. The difference is that this colour is not as opaque or shimmery.

The camera does not seem to pick up the I Juggle Men but it is on there, and has given it a lovely shimmer!!!!

Just for fun I added a Silver Shatter Top Coat - the shimmer is lovely coming through it - and I will try and demonstrate this with a darker colour.
Thanks for reading, have you used this collection?!
Claire xxx
Monday, 16 May 2011
OPI Pirate's of the Caribbean with Silver Shatter
I went to Lena White today to pick up some supplies and got distracted by the Pirate's of the Caribbean collection on display and just had to pick some of them up, and got some of the new Silver Shatter top coat too!! I got Silver Shatter, Planks A Lot, Sparrow Me The Drama, Mermaid's Tears and Steady As She Rose. These were my favorite colours from the collection, but I probably will get the rest soon!

I couldn't wait to try them all out so have painted one finger with each of the four colours I picked up.


I couldn't wait to try them all out so have painted one finger with each of the four colours I picked up.

The coverage is great with one coat, though the lacquer is quite matte

This is with two coats of colour

Planks A Lot

Sparrow Me The Drama

Mermaid's Tears

Steady As She Rose

This is with a thick coat of the Silver Shatter Top Coat

Close up of the Silver Shatter
The silver shatter is very different to the black Shatter. The silver is shimmery and almost glittery - the colour is not dissimilar to DS Radiance. I am liking it, and think it will also look great over darker colours. The bottles are the same as the Black Shatter. The silver is a lot runnier than the black and the cracks as it dries are not as clean as they are with the colours, but it really is a nice effect.

Have any of you used this collection yet? I really love the summer colours and think that these are going to be very popular over the coming months as my clients really are looking for something different. I cannot wait for the rest of the Shatter colours to hit the UK!
Have a great week guys!
Claire xxx
Sunday, 15 May 2011
Essie 'Silken Cord' with OPI Black Shatter and Tape Design!! Step by Step
Hi All,
Welcome to my lovely new followers! I hope that you have all had a good weekend. I am currently on strict bed rest recovering from a ruptured ovarian cyst! Thank goodness it was not my appendix and I will be all better in a week or so - There will hopefully be some more detailed post as I will have some time on my hands!!
I have decided to try out my Essies 'Silken Cord' from their 2010 Fall collection, which has been sitting in my case, for about 6 months unused!! I used tape and shatter top over it just to see if it made a difference. I quite like the effect using the tape with the shatter and can't wait to try it with the other colours when they come to the UK!
This is what I did:
I prepped my nails, removing cuticles and applying base coat - I have used Lumos base coat

I applied 1 coat of 'Silken Cord' by Essie

I then applied a second coat of lacquer


To use tape, I use Scotch tape and cut it to different sizes and laid them out on a plastic lid

Once my lacquer was dry I put the tape on the nail pressing lightly into place

When the tape was on all the nails I applied shatter top coat quite thick (you can use it thinner, but you get smaller Shattered bits)
When dry, carefully peel away the tape


I like a shiny finish to my nails and shatter I applied Lumos top coat which dries really quickly!


What do you think?! Have you used your Shatter in any different ways?
Claire xxx
Welcome to my lovely new followers! I hope that you have all had a good weekend. I am currently on strict bed rest recovering from a ruptured ovarian cyst! Thank goodness it was not my appendix and I will be all better in a week or so - There will hopefully be some more detailed post as I will have some time on my hands!!
I have decided to try out my Essies 'Silken Cord' from their 2010 Fall collection, which has been sitting in my case, for about 6 months unused!! I used tape and shatter top over it just to see if it made a difference. I quite like the effect using the tape with the shatter and can't wait to try it with the other colours when they come to the UK!
This is what I did:
I prepped my nails, removing cuticles and applying base coat - I have used Lumos base coat

I applied 1 coat of 'Silken Cord' by Essie

I then applied a second coat of lacquer


Once my lacquer was dry I put the tape on the nail pressing lightly into place

When the tape was on all the nails I applied shatter top coat quite thick (you can use it thinner, but you get smaller Shattered bits)


When dry, carefully peel away the tape


I like a shiny finish to my nails and shatter I applied Lumos top coat which dries really quickly!


What do you think?! Have you used your Shatter in any different ways?
Claire xxx
Saturday, 14 May 2011
Weekly Blog Round Up - Week 7!!!!!!!
Hey Guys,
This weeks blog round up is below! Take a look at some of these great bloggers, why not follow them to?!
Hope you had a great week!
Claire xxx
This weeks blog round up is below! Take a look at some of these great bloggers, why not follow them to?!
Hope you had a great week!
Claire xxx
The Nail Addict created a gorgeous water marble design http://thenailaddict.blogspot.com/2011/05/pink-water-marble-design.html
Emily must be looking forward to carnival http://emilysnailfiles.blogspot.com/2011/05/totally-tropical.html
Theresa reversed the French in black and silver http://theresabloor.blogspot.com/2011/03/nail-design-of-day_31.html
Stacie painted her nails to match her dotty 50’s dress http://kawaiinailart.blogspot.com/2011/05/whats-black-white-and-red-all-over.html
Claire used Fimo clay flowers http://toptwentynails.blogspot.com/2011/05/notd-opi-nicoles-it-starts-with-me.html
Sharon is having a great giveaway http://polishinfatuated.blogspot.com/2011/03/thank-you-sorry-giveaway.html
Lady Luck wore her hearts on her nails http://ladyluckbeauty.blogspot.com/2011/05/navy-baby-is-in-air.html
AJ used her BM plates to create a cool herringbone pattern http://thatssofresh.blogspot.com/2011/05/pink-wednesdays.html
Shella was inspired by a Japanese nail art design http://polishwonderland-byshella.blogspot.com/2011/05/flower-summer-manicure.html
LingLing is having a great competition http://wuliaonails.blogspot.com/2011/05/first-contest-ever.html
And finally introducing Ari she is new to blogging http://ari-sweetdelight.blogspot.com/2011/05/nail-design-strawberry.html
If you would like to be involved in future round ups contact Stacie at http://kawaiinailart.blogspot.com
Thursday, 12 May 2011
A couple of Nicole by OPI polishes from my trip to America
Hi Guys,
Hope you are all having a good week. My nails have been in such a state from all the enhancement practise I have been doing on them I decided to cut them down and start again. I also might be needing surgery over the next few days and was advised not to wear any gels or acrylics, so thought I would show you 2 more of the polishes I got in America a couple of weeks ago. Sorry for no pretty patterns, I can't sit up for too long at the moment!!!
I was excited to pick up some of the OPI Nicole polishes as we cannot get them in the UK and the colours are different! These 2 bottles don't have the perfect stroke brush and I found them much easier to use. The colour dried quickly and I could have got full coverage in one coat, but I have used 2 coats. I have put colour descriptions down with the images.
The polishes I picked up were from Ulta in New Jersey where they were buy 2 get one free and were around $6.
This update is using the pink colour 'You're An Angel' and the blue colour is 'It's Up To You'. I used the Lumos top and base coat.


Hope to update more over the weekend with some new gel and shellac designs!
Have you tried the Nicole range - what do you think of the colours?
Have a great weekend,
Claire xxxx
Hope you are all having a good week. My nails have been in such a state from all the enhancement practise I have been doing on them I decided to cut them down and start again. I also might be needing surgery over the next few days and was advised not to wear any gels or acrylics, so thought I would show you 2 more of the polishes I got in America a couple of weeks ago. Sorry for no pretty patterns, I can't sit up for too long at the moment!!!
I was excited to pick up some of the OPI Nicole polishes as we cannot get them in the UK and the colours are different! These 2 bottles don't have the perfect stroke brush and I found them much easier to use. The colour dried quickly and I could have got full coverage in one coat, but I have used 2 coats. I have put colour descriptions down with the images.
The polishes I picked up were from Ulta in New Jersey where they were buy 2 get one free and were around $6.
This update is using the pink colour 'You're An Angel' and the blue colour is 'It's Up To You'. I used the Lumos top and base coat.

'It's Up To You' - Blue

'You're An Angel' - Pink

This blue has a slight purple sheen to it, which can only be seen when it catches bright light - a really nice colour with more depth than just a normal blue!

This colour has slight gold glitter and shimmers to it, in some lights it appears to have a slight orange hue, which is lovely when it catches the light!

To get the best of both, I have painted alternate fingers - I love a pink and blue combination!

This picture is taken in the shade
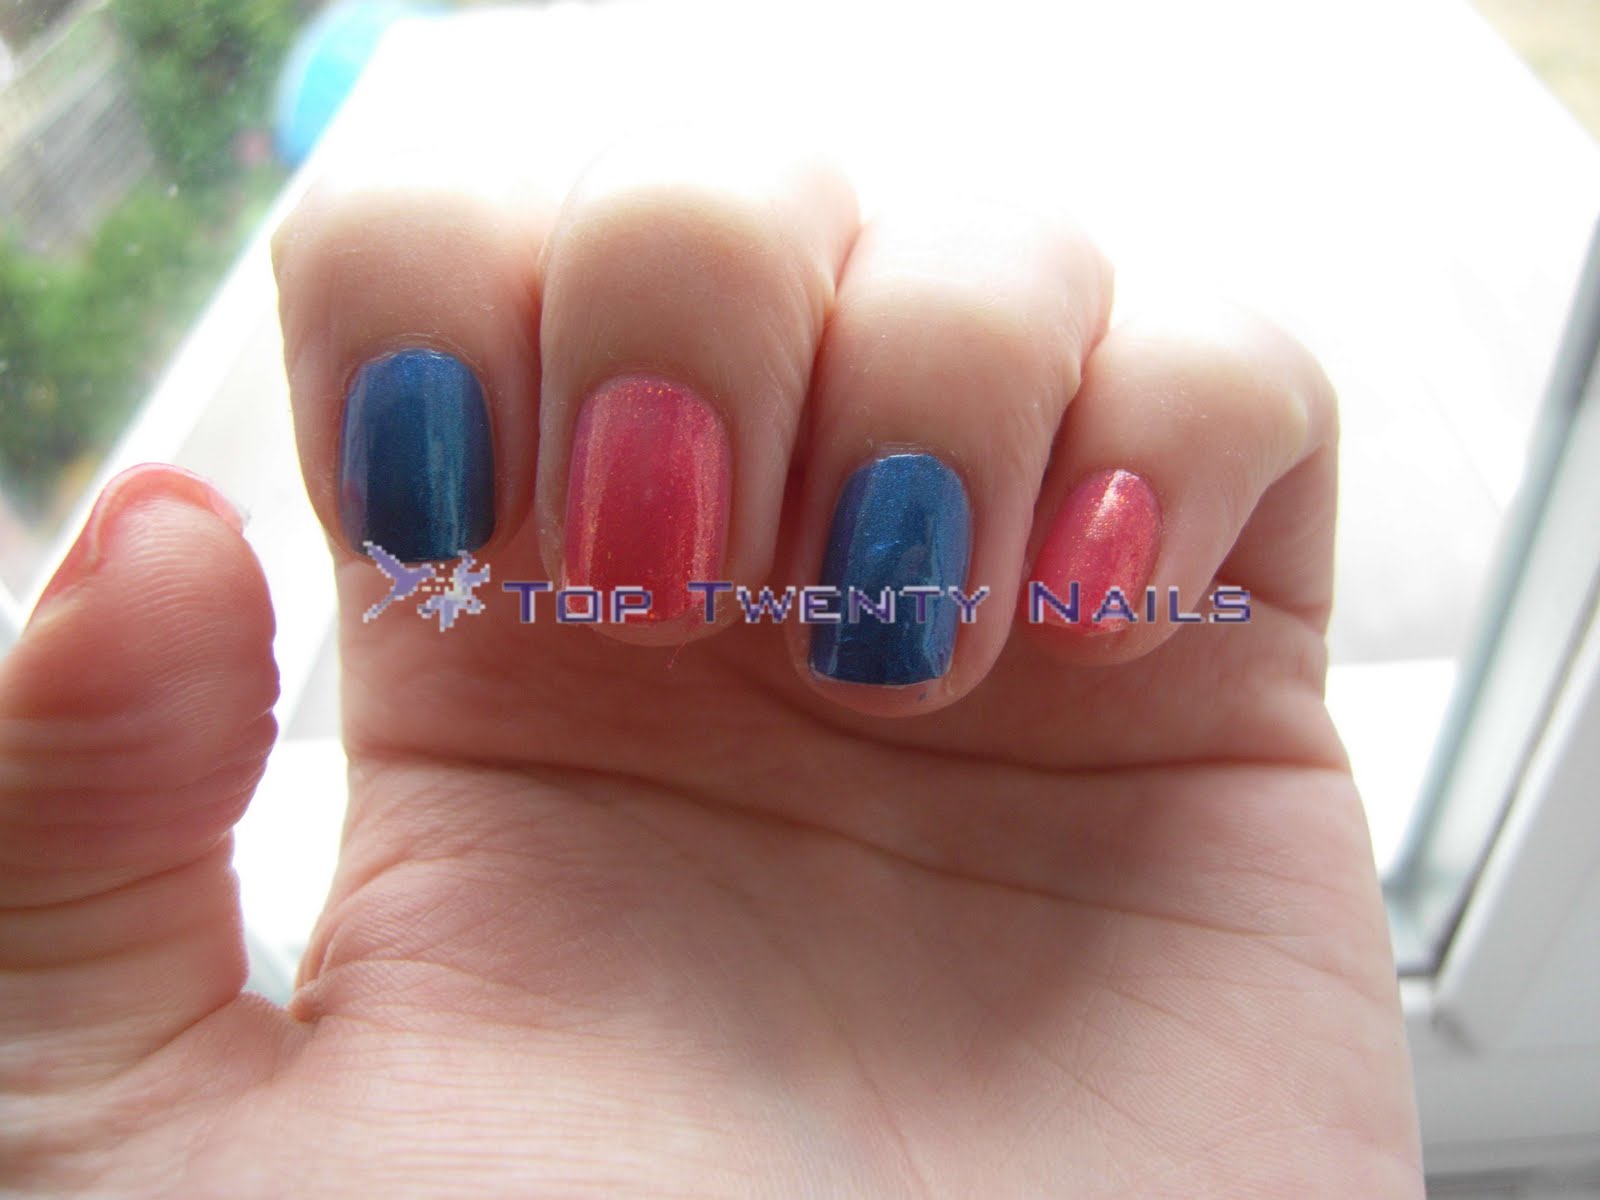
This is in sunlight
Hope to update more over the weekend with some new gel and shellac designs!
Have you tried the Nicole range - what do you think of the colours?
Have a great weekend,
Claire xxxx
Subscribe to:
Posts (Atom)